

So far in this series we’ve uploaded files using the Snowsight UI, which has a limitation of 50mb currently. In my experience, not many data files are 50mb or less (even when compressed). For testing and demo purposes, this shouldn’t be an issue; however, in practice, data engineers need to stage files much larger than 50mb. External stages such as an S3 bucket have an advantage to use a 3rd party SFTP tool like WinSCP or FileZilla to connect via SFTP once properly configured. But what are the options for Snowflake internal stages? One option is SnowSQL and use the command line interface to connect and push files to the stage. Another more option I’ll discuss in this article is using Snowpark and Python to script the file load.
In this article I’ll cover basic Snowpark setup for Python, using a credentials file to connect to Snowflake and using Snowpark to upload a file to Snowflake.
Snowpark Setup
This demo code assumes that you have a Python development environment setup of your choosing. If you do not already have the Snowpark library installed, you’ll need to install it first. Snowflake documentation has a detailed walkthrough on setup. I prefer using VS Code for my development environment coming from .NET and SQL Server, but any Python editor will do. For my environment, I only needed to add the Snowpark library using pip.
python -m pip install snowflake-snowpark-python Python Script
As part of this demo, we’ll take some liberties and hard code some items such as the stage name we’re loading to as well as placing the file to upload in the same folder as our .py script to limit any issues with file paths, etc.
Folder Setup
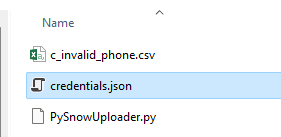
First let’s create a working folder on our file system called “PySnowUploader”, once the file is created, add three files: credentials.json, PySnowUploader.py both of which are empty for now, and the third is a text file of your choosing. In the sample below, you’ll see the invalid phone number file from our previous posts. We’ll upload that to our stage once the script is complete.
Credentials Setup
Before we can connect to Snowflake, we’ll need to setup our credentials.json file with our connection properties. The file content should look like the following, replace the parameters such as user and password with your credentials. I’ve set the database, schema, role and warehouse values below to the objects set up as part of prior posts. Once credentials.json is updated, save the file, we’ll then reference it as part of our connection string to Snowflake.
{
    "account":"YOUR ACCOUNT",
    "user":"USERNAME",
    "password":"PASSWORD",
    "database":"ST_DEMO_DB",
    "schema":"ST_INTERNAL_STAGES",
    "role":"ST_DEMO_ROLE",
    "warehouse":"ST_DEMO_XS_WH"
}
Using Snowpark with Python
Initial Setup
Now that the credentials.json file is ready, we can begin working on PySnowUploader.py to set up our file upload. First thing needed is to import all the modules necessary for our script. We’ll need Snowpark, sys and json. Snowpark is needed for connection to Snowflake; sys and json are needed for reading and processing our credentials file.
import sys, json
import snowflake.snowpark as sp
Importing Credentials
Before connecting to Snowflake, we’ll need to import the credentials.json file into a Python dictionary in order to build the Snowflake session. This is where the json library is important in order to read the credentials files properly.
#READ CREDS FILE INTO A DICTIONARY; CLOSE .JSON WHEN DONE
with open("credentials.json") as jsonfile:
    creds = json.load(jsonfile)
    jsonfile.close()
Build Snowflake Session
Next we will create and open a Snowflake session with the Session.builder methods from Snowpark and our creds dictionary.
#CREATE SESSION VARIABLE
session = sp.Session.builder.configs(creds).create()
Define Stage Name and File Name Variables
In order to upload a file to a stage, we’ll need to define the stage name a file name to upload. We’ll explicitly set them here; however, other options include reading stage names from Snowflake directly and looping through directory to load multiple files. In the code block below, we set the stage name to our demo stage from an earlier post and the file name to the test file in our working directory.
#LOAD LOCAL VARS
sf_stage_name:str = "@ST_DEMO_STAGE"
upload_file:str = "c_invalid_phone.csv"
Upload the File to Snowflake
All the prerequisite objects needed for file upload have been defined in the .py file at this point. The next objective is to push the file to the stage using a PUT command. Doing so with Snowpark is like using an SFTP or SnowSQL PUT command. There are several options that can be set such as overwrite, which overwrites the target file in the case of a name collision, and auto_compress, which will compress the file using gzip as part of the file load. More details about each option can be found in the Snowflake Documentation.
To make sure to trap any errors, we’ll wrap the put command in a try/except statement. Additionally, for this example, we will not overwrite the target and not compress the file.
#TRY TO PUT FILE
try:
    #PUT THE FILE
    put_results = session.file.put(
        local_file_name=upload_file,
        stage_location=sf_stage_name,
        overwrite=False,
        auto_compress=False)
    #PRINT THE RESULTS
    for r in put_results:
        str_output = ("File {src}: {stat}").format(src=r.source,stat=r.status)
        print(str_output)
except Exception as e:
    #PRINT THE ERROR
    print(e)
“Putting” It All Together
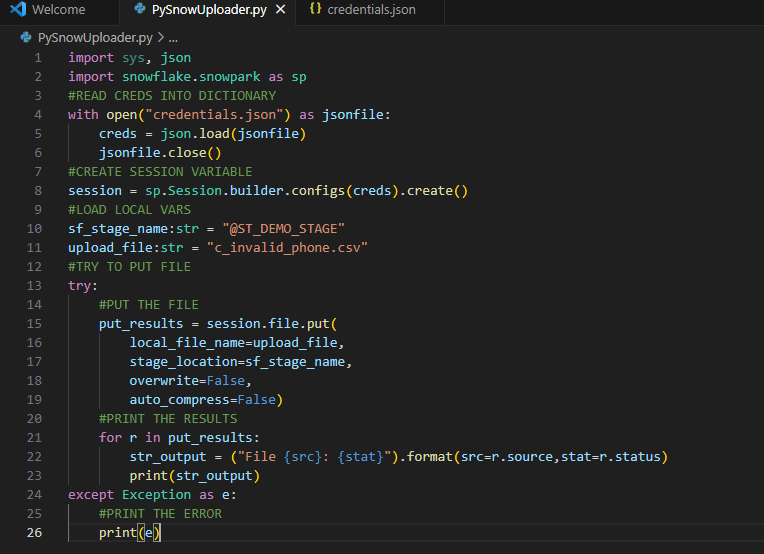
We’ve assembled the components for uploading a file to a Snowflake internal stage using Snowpark and Python in less than 30 lines of code – including comments! Removing the comments brings the total line count to roughly 20. The complete PySnowUploader.py file should look like the following:
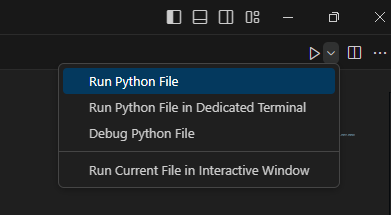
All that’s left is to run the code and see the output. I’m using VS Code, so I can either press F5 to run with debug, or choose “run Python file” in the upper right corner of the IDE. You can also run the file from the command line, it’s really dealer’s choice on how you want to run the code.
Upon successful execution, the file name and the “UPLOADED” status will be printed to the console, and we can verify through our Snowsight UI.
File c_invalid_phone.csv: UPLOADED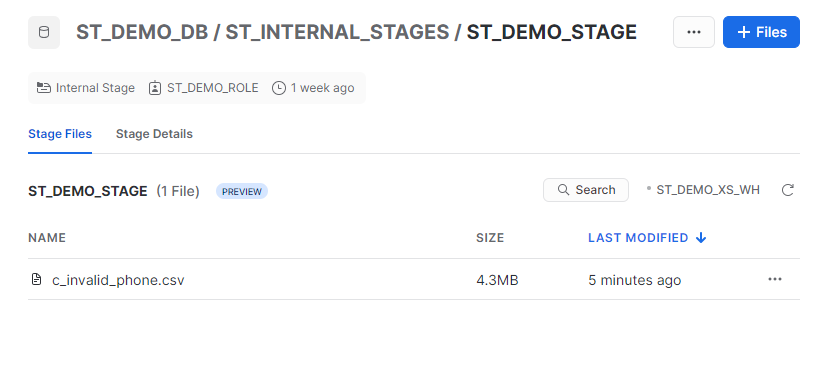
Conclusion
Using the power of Snowpark and Python, we created a simple file loader to push a file from our local machine to our Snowflake internal stage location in under 30 lines of code. With a few minor enhancements, this code could easily upload multiple files from a directory, list files already in the stage or add any number of error checking options. Perhaps this could be the starting framework for a Streamlit app? I think so, but that’s for another post.
The source code and configuration file used in this walkthrough is available on my GitHub repository.
Happy coding!
