In the first article in this series, we configured the Snowflake environment for connecting Domo to Snowflake using Cloud Amplifier. Next, we setup read access to Snowflake. This article will cover writeback with Cloud Amplifier.
Connect Domo Cloud Amplifier
As in the last article, this walkthrough assumes you have at least demo Snowflake and Domo accounts. The screenshots are from my demo accounts – yours may look different but the steps to implement are the same.
First, login to your Domo account and click on the Data icon. in the top menu bar. Next, click on the Data Warehouse icon on the left menu bar. Now, click on the Domo icon in upper right corner of the “Data Wheel”. Click the + button to add a new cloud account. Next, click the Snowflake icon and then click “Add New Integration”.

Configure Snowflake Connection
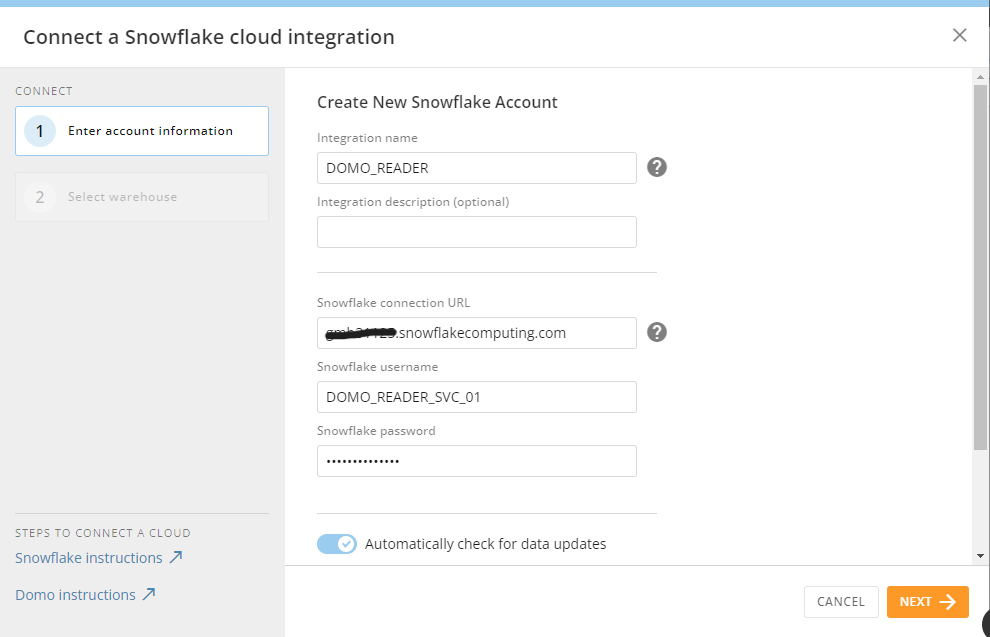
In the screen that opens after choosing “Add New Integration” in the step above, this is where you’ll need all your Snowflake information that we configured in the first article in this series. The required items for the connection are listed below:
- Integration Name: This is a unique integration name in Domo. For this demo, I’m going to use DOMO_WRITER because this integration will just be for writing to Snowflake
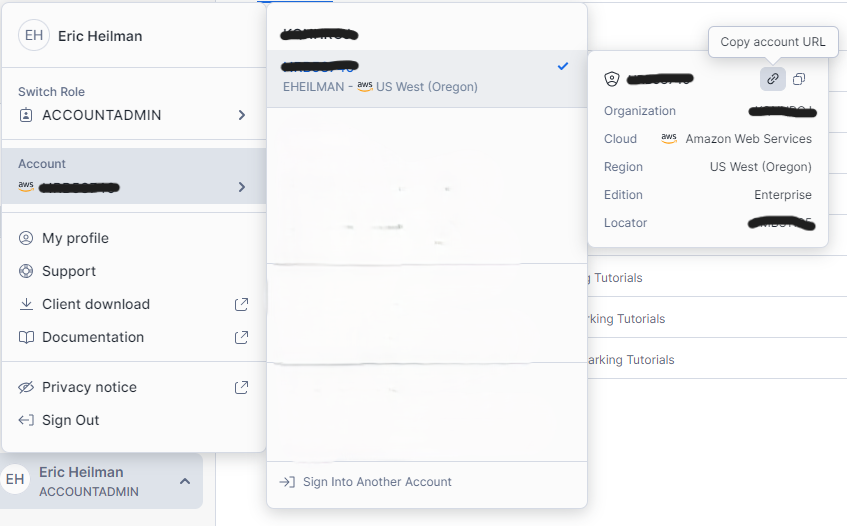
- Snowflake Connection URL: The URL for your Snowflake account which looks like XXXXXXXX.snowflakecomputing.com where the X’s represent your account. Do not include the https:// in the URL. You can get this information from your Snowflake account through Snowsight:
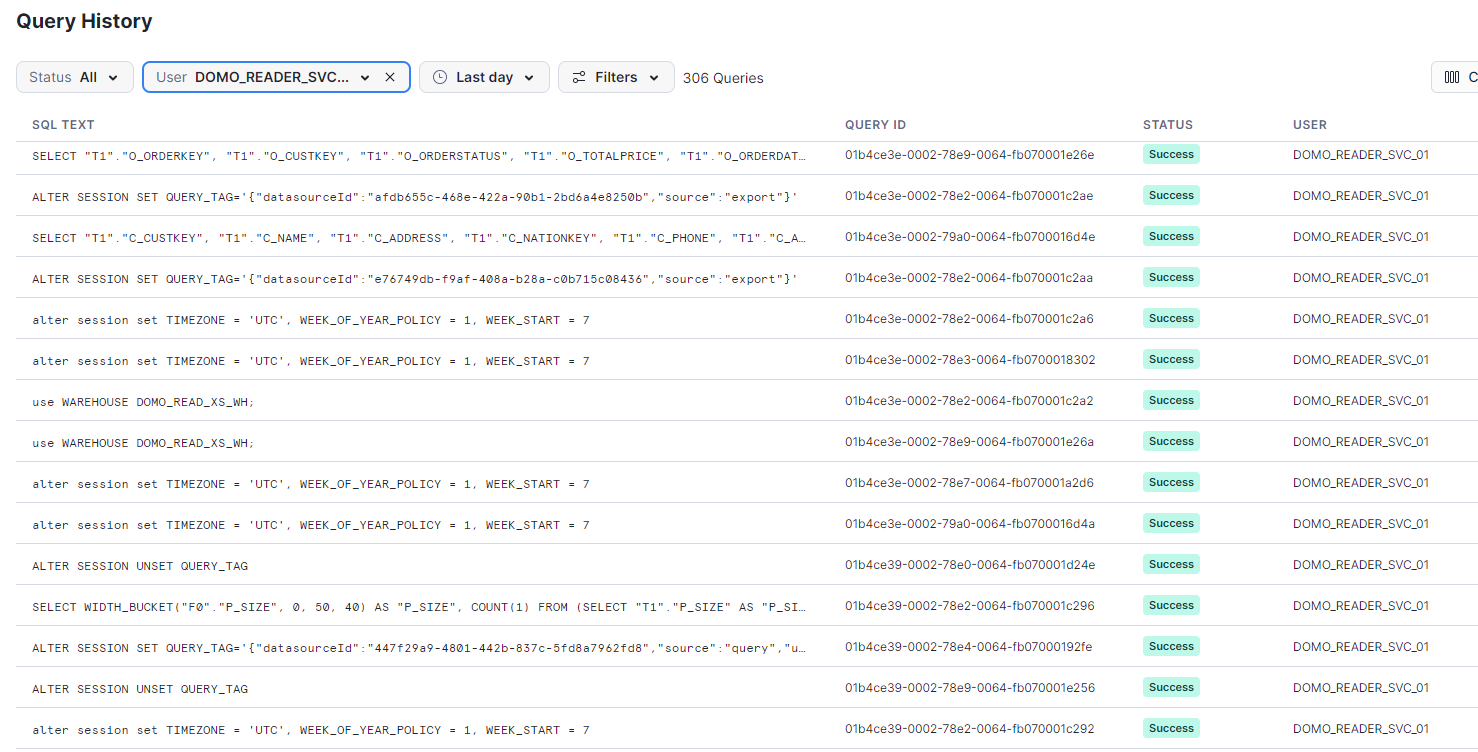
- Snowflake Username: username of the account to connect to Snowflake. I’ll use the reader service account created previously: DOMO_WRITER_SVC_01
- Snowflake Password: password for the account above
Additional Settings
In the connection setup screen there are two additional settings you may want to change based upon your use case.
- Check for data updates every: this setting is how frequently Domo will check for data changes in Snowflake. Adjusting this value to match the frequency of your Snowflake data loads/changes will help with Snowflake costs. Every “check” from Domo will consume Snowflake credits to query metadata looking for data changes. If your data only loads once a day, there’s no need for Domo to check every 15 minutes for changes.
- Cache TTL: this sets how long the data will remain cached in Domo.
After completing the fields as shown, click the Next button to continue with setup.

Configuring Write Operations
Once the connection is configured, Domo will show the list of compute warehouses the account has access to. From the operations selection box, check the LOAD and QUERY options. These options will allow our connection to read and write from the Snowflake.

Setup Write Integration
This demo is primarily for establishing the WRITEBACK portion of Cloud Amplifier. Next, we’ll click on “Configure Write Access”. Domo will walk us through some additional SQL setup in Snowflake necessary to allow writeback to Snowflake. Note that we’ll need the Snowflake role and database name we setup in the initial setup article.
Enter the role and database name configured in the initial setup, and then click Generate SQL. Domo will generate three SQL Commands to run in your Snowflake account. The first one should look familiar as we already ran that as part of our initial setup. The second and third commands will need to be copied and executed in Snowflake to setup the integration between Snowflake and Domo.


We’ll need several pieces of information from the DESC command in Snowflake to finish the connection. After configuring the storage integration and running the DESC query below click the next button. In the fields provided, copy/paste the values from Snowflake to Domo for the AWS Connection and then click Next.
DESC INTEGRATION DOMO_DB_DOMO_INTEGRATION;
SELECT "property","property_value" FROM TABLE(RESULT_SCAN(LAST_QUERY_ID()))
WHERE "property" IN ('STORAGE_AWS_IAM_USER_ARN','STORAGE_AWS_EXTERNAL_ID');

Finally, copy the last SQL Command and execute it in Snowflake to complete setup of the Stages needed for Domo to write to Snowflake. After doing so, click Next. Domo will prompt one last screen asking you to confirm that Domo can make changes to your Snowflake account. Check the box and click Next.


Writing Data From Domo to Snowflake
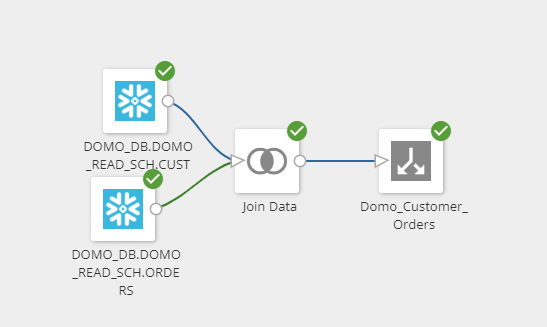
With the writeback connection setup, now we can use Domo’s Magic ETL to write data back to Snowflake. Setup in Magic ETL would be the same as writing back to Domo, except in the target dataset, we’ll specify the DOMO_WRITER as the cloud target.

Domo will write the data back to Snowflake in the defined database in the connection; however, at the time of this article, specifying the schema location of the data is not supported. Domo will create a new schema in the database and then write the data there.


Wrapping Up
In this article, we walked through setting up Domo for write access to Snowflake using Cloud Amplifier. With so many built in Domo connectors like Twitter, Facebook, Excel, and many others – imagine the possibilities of pairing Domo’s ETL tools to import data to Snowflake, leverage the power of Snowflake’s data processing capabilities and finally use Domo’s visualization tools for display.
Snowflake and Domo work well together and the integrations are getting even better. Hopefully in the near future we’ll be able to specify the database and schema for writing back to Snowflake.
Follow me on LinkedIn and Medium for more content on Data Management and demos including Snowflake, Streamlit, and SQL Server.